How to add new domains and subdomains in Plesk
This article describes how to add a new domain in Plesk. After you create a domain, you can also optionally add subdomains and domain aliases.
Adding a new domain
To watch a video that demonstrates the following procedure, please click below:
To add a new domain in Plesk, follow these steps:
- Log in to Plesk.If you do not know how to log in to your Plesk account, please see this article.
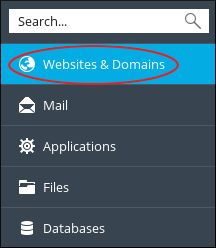
- In the left sidebar, click Websites & Domains:
- Click :
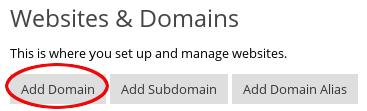
The Adding New Domain Name page appears:
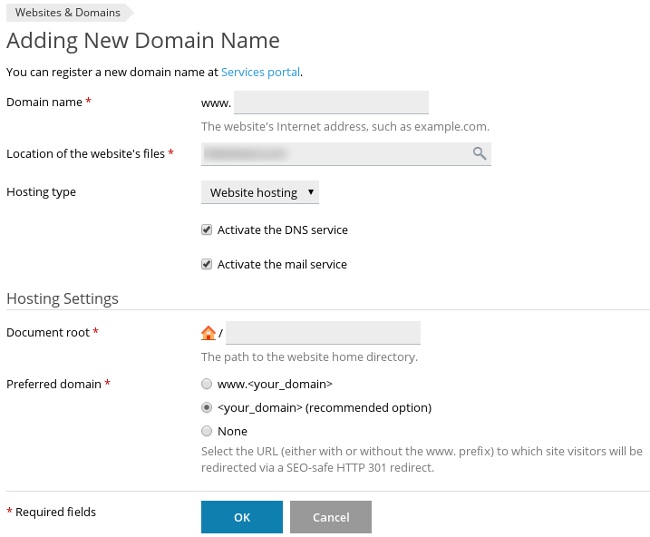
- In the Domain name text box, type the domain name for the site.
In the Hosting type list box, select one of the following options:
- Website hosting: This option enables you to host a website and e-mail services.
- Forwarding: This option enables you to redirect traffic from one site to another site. For more information, please see Adding a new forwarding domain below.
- No hosting: This option enables you to host DNS and e-mail services, but not a website.
- Confirm that the Activate the DNS service and Activate the mail service check boxes are selected.
Under Hosting Settings, Plesk automatically completes the Document root and Preferred domain options. Confirm that they are set to the values you want.
- The document root is the directory where the website files are actually stored.
- The preferred domain option enables you to redirect a website. This is frequently used for SEO (Search Engine Optimization) purposes.
- Click . Plesk adds the domain.
Adding a new subdomain
To watch a video that demonstrates the following procedure, please click below:
After you create a domain, you can easily add a new subdomain (for example, testing.example.com). To do this, follow these steps:
- Log in to Plesk.If you do not know how to log in to your Plesk account, please see this article.
- In the left sidebar, click Websites & Domains:
- Click .
- In the Subdomain name text box, type the subdomain name you want to use.
- In the Parent domain list box, select the parent domain.
- Under Hosting Settings, Plesk automatically completes the Document root option. Confirm that it is set to the value you want.
The document root is the directory where the website files are actually stored.
- Click . Plesk adds the subdomain.
Adding a new domain alias
Domain aliases enable you to point one or more domains to your primary domain. For example, if your primary domain is example.com, you could have domain aliases for example.org and example.net that point to example.com.
To watch a video that demonstrates the following procedure, please click below:
To add a new domain alias, follow these steps:
- Log in to Plesk.If you do not know how to log in to your Plesk account, please see this article.
- In the left sidebar, click Websites & Domains:
- Click . The Add a Domain Alias page appears.
- In the Domain alias name text box, type the name of the domain alias.
- In the for the domain list box, select the domain (the primary domain) for which you are creating the alias.
- Under Settings, select the options you want for the domain alias:
- To synchronize DNS between the primary domain and the domain alias, select the Synchronize DNS zone with the primary domain check box.
When this option is enabled, any changes you make to the DNS zone of the primary domain are also applied to the DNS zone of the domain alias.
- To enable e-mail for the domain alias, select the Mail service check box.
- To enable web content for the domain alias, select the Web service check box.
- To redirect the domain alias using the HTTP 301 (Moved Permanently) status code, select the Redirect with the HTTP 301 code check box.
When this option is enabled, search engines only index the primary domain. If this option is disabled, search engines index the domain alias and the primary domain, which can negatively affect search engine rankings.
- To synchronize DNS between the primary domain and the domain alias, select the Synchronize DNS zone with the primary domain check box.
- Click . Plesk adds the domain alias.
Adding a new forwarding domain
Domain forwarding enables you to redirect traffic from one site to another site. This feature is useful if you want to send traffic to another site that is hosted on a different server.
To watch a video that demonstrates the following procedure, please click below:
To add a new forwarding domain, follow these steps:
- Log in to Plesk.If you do not know how to log in to your Plesk account, please see this article.
- In the left sidebar, click Websites & Domains:
- Click . The Adding New Domain Name page appears.
- In the Domain name text box, type the domain name you want to use as a forwarder.
- In the Hosting type list box, select Forwarding.
- Confirm that the Activate the DNS service and Activate the mail service check boxes are selected.
- Under Forwarding Settings, in the Destination address text box, type the domain name of the target website.
For example, if you type example.com in step 4, and then type example.org in this step, example.com will forward to example.org.
- In the Forwarding type section, select the forwarding method you want to use:
- Moved permanently (code 301)
- Moved temporarily (code 302)
- Frame forwarding
- Click . Plesk adds the forwarding domain.
More Information
For more information about Plesk, please visit https://www.plesk.com.
Article Details
- Operating System: Linux Hosting
- Control Panel: Plesk
- Product: Managed WordPress with Plesk
- Level: Beginner
Grow Your Web Business
Subscribe to receive weekly cutting edge tips, strategies, and news you need to grow your web business.
No charge. Unsubscribe anytime.
Did you find this article helpful? Then you'll love our support. Experience the A2 Hosting difference today and get a pre-secured, pre-optimized website. Check out our web hosting plans today.