How to manage users in Plesk
This article describes how to create and manage users for a Plesk account. User accounts enable you to grant access to specific people. These people can then access Plesk to manage websites, applications, or e-mail under your domains.
Table of Contents
Creating a user
To watch a video that demonstrates the following procedure, please click below:
To create a user in Plesk, follow these steps:
- Log in to Plesk.If you do not know how to log in to your Plesk account, please see this article.
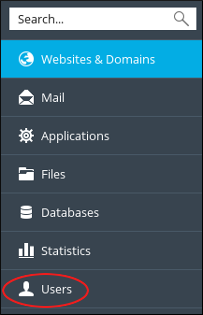
- In the left sidebar, click Users:
- On the Users page, click .
- On the Create User Account page, under General Information, in the Contact name text box, type a name for the contact.
In the Email address text box, type the e-mail address of the user.
You can use an existing external e-mail address, or create a new e-mail address that uses your domain.In the User role list box, select the user role you want to assign to the user.
For information about how to manage user roles in Plesk, please see this article.In the Access to subscriptions list box, select the subscription or subscriptions to which you want the user to have access.
For information about how to manage subscriptions in Plesk, please see this article.- Under Plesk Preferences, in the Username text box, type a username for the user.
In the Password and Confirm password text boxes, type a password for the user.
Alternatively, you can click and Plesk generates a strong, random password for you.- In the Plesk language list box, select the language for the user.
- Confirm the User is active check box is selected.
- Click . Plesk creates the user.
Managing a user
To manage an existing user on your Plesk account, follow these steps:
- Log in to Plesk.If you do not know how to log in to your Plesk account, please see this article.
- In the left sidebar, click Users:
- On the Users page, click the name of the user you want to manage.
- On the user account page, click .
- Change the settings you want to modify, and then click . Plesk updates the user account.
Removing a user
You can remove an existing user at any time if you no longer want them to have access to your account. To do this, follow these steps:
- Log in to Plesk.If you do not know how to log in to your Plesk account, please see this article.
- In the left sidebar, click Users:
- On the Users page, select the check box next to the name of the user you want to remove.
- Click , and then click . Plesk deletes the user account.
More Information
For more information about Plesk, please visit https://www.plesk.com.
Article Details
- Operating System: Linux Hosting
- Control Panel: Plesk
- Product: Managed WordPress with Plesk
- Level: Beginner
Did you find this article helpful? Then you'll love our support. Experience the A2 Hosting difference today and get a pre-secured, pre-optimized website. Check out our web hosting plans today.