How to use the WordPress Toolkit in Plesk
This article provides an overview on how to use the WordPress Toolkit in Plesk. The WordPress Toolkit enables you to easily install, configure, and manage multiple WordPress installations from one convenient interface.
Table of Contents
Using the WordPress toolkit
To watch a video that demonstrates the following procedures, please click below:
Quick access
To quickly access frequently-used WordPress Toolkit features, follow these steps:
- Log in to Plesk.If you do not know how to log in to your Plesk account, please see this article.
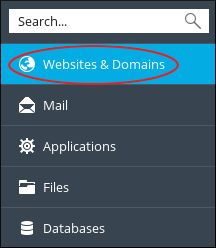
- In the left sidebar, click Websites & Domains:
- Scroll to the management area for the domain where WordPress is installed.
- Click any of the following options in the toolbar:

- To log in to WordPress, click Log In.
- To run a security check on the WordPress installation, click Check Security.
- To manage plugins for the WordPress installation, click Plugins.
- To manage themes for the WordPress installation, click Themes.
- To clone the WordPress installation, click Clone.
- To synchronize a WordPress instance with another instance, click Sync.
Complete access
To access the complete WordPress Toolkit, follow these steps:
- Log in to Plesk.If you do not know how to log in to your Plesk account, please see this article.
- In the left sidebar, click WordPress. The WordPress Toolkit page appears.
- On the Instances tab you can manage your WordPress installations:
- To install a new instance of WordPress, click , and then click Install (Quick) or click Install (Custom).
- To locate all WordPress instances on your account, click .
- To check for WordPress updates, click .
- To manage security for your WordPress instances, click .
- There are many additional options for each WordPress instance listed.
On the Plugins tab you can manage WordPress plugins:
- To install a plugin, click .
- To upload a plugin, click .
- To activate a plugin, click .
- To deactivate a plugin, click .
- To uninstall a plugin, click .
- To update a plugin, click .
On the Themes tab you can manage WordPress themes:
- To install a theme, click .
- To upload a theme, click .
- To uninstall a theme, click .
- To update a theme, click .
More Information
For more information about Plesk, please visit https://www.plesk.com.
Article Details
- Operating System: Linux Hosting
- Control Panel: Plesk
- Product: Managed WordPress with Plesk
- Level: Beginner
Did you find this article helpful? Then you'll love our support. Experience the A2 Hosting difference today and get a pre-secured, pre-optimized website. Check out our web hosting plans today.